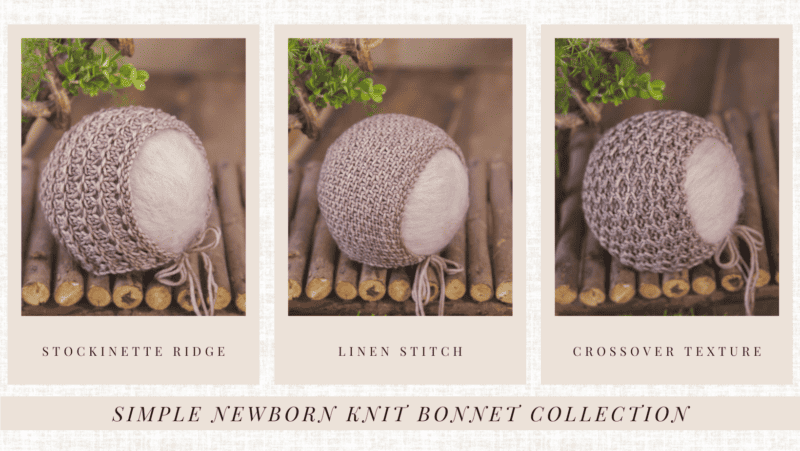
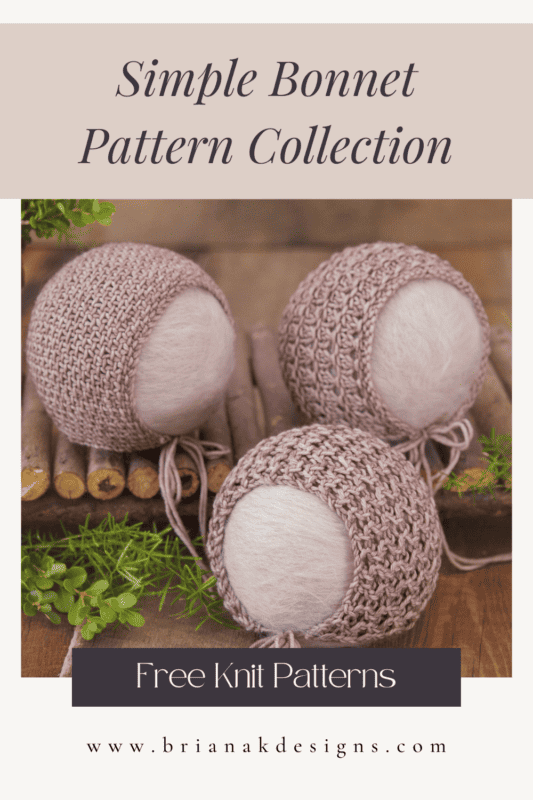
Set One - Simple Newborn Bonnet Free Knit Patterns Collection
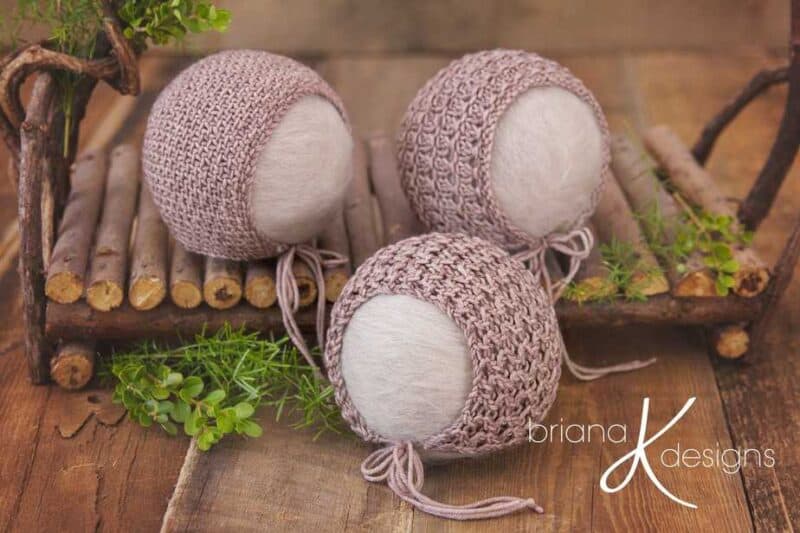
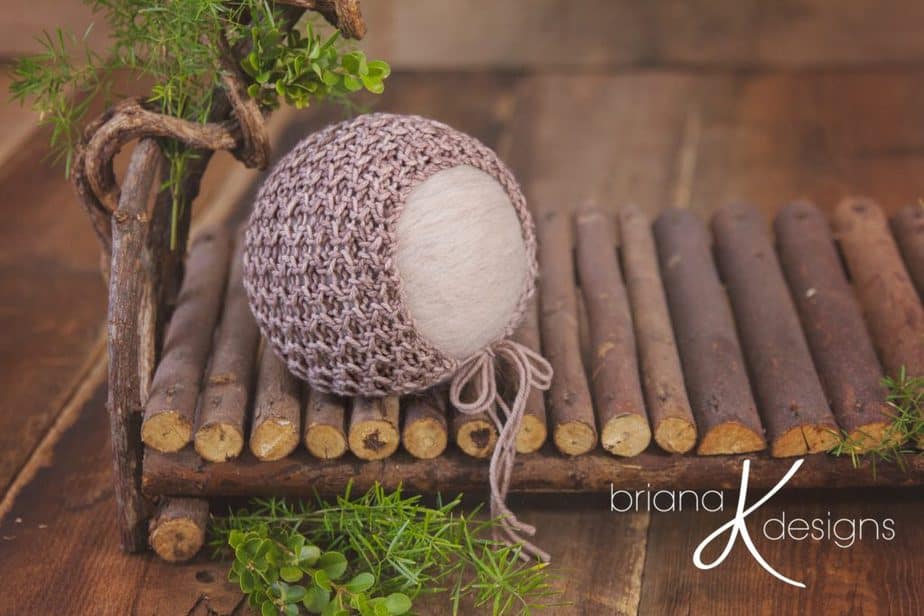
These knit baby bonnet free patterns are sure to become a treasured item. Each bonnet is handcrafted with love, and attention. You can use 100% organic or natural fibers, ensuring each piece is unique and special in its own way.
Or feel free to substitute with an acrylic yarn from your stash. No two bonnets are the same! Each one has a unique knit texture and simple design.
What’s unique about these simple newborn bonnet patterns?
Each bonnet has 4 finishing options for the back of the hat. This means you can use whatever needles you want for each bonnet. Finish the bonnet backs:
- In the round in pattern
- In the round with no finishing pattern
- Flat in pattern
- Flat with no finishing pattern
Where To Purchase My Ad-Free Downloadable PDF's:
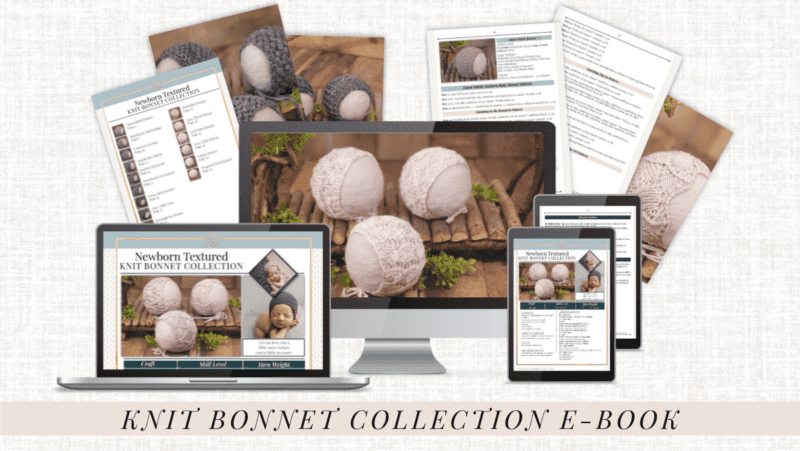
Get all 15 Knit Bonnet Patterns in an E-book
Not only are these bonnet packs full of beautiful textures and stitches, but they are also a great way to learn new stitches and grow new skills.
Perfect for newborn photography, bringing a baby home from the hospital, or an heirloom gift.
And of course, if you are looking for more knit bonnet inspiration check out A Collection of 15 Bonnet Knitting Patterns Free.
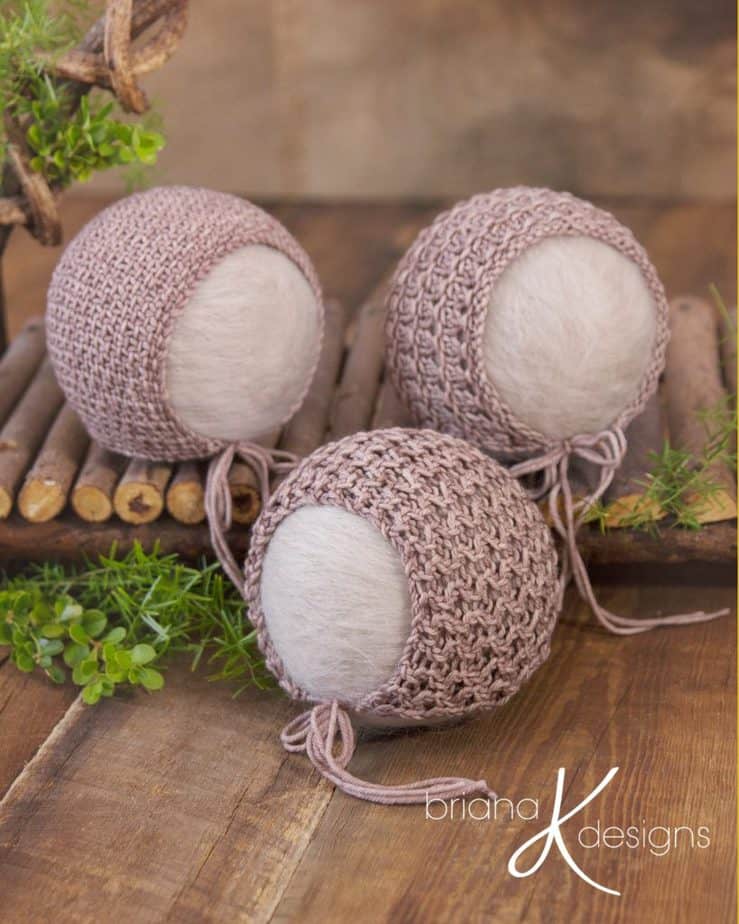
These bonnets are an investment - they will last for years! And don't worry if you prefer knitting in the round or flat. I have options to create these newborn bonnets on any needle you prefer.
Supplies for the Newborn Bonnets:
Knitting Needles:
8 (5.0mm) and can be knitted on Straight Needles, Circular Needles (min 28-inch cord), or DPN’s
Notions:
Stitch Marker
Sewing Needle
Scissors
Cable Needle
Row Counter if needed
Yarn:
Malabrigo Rios Worsted Weight Yarn
Shown in Playa Colorway
Yarn Substitute:
WeCrochet Heatherly Worsted
80% Acrylic, 20% Merino Wool
Yardage:
50-60 yards per bonnet
Abbreviations/Stitches:
CO- cast on
k- knit
k2tog- knit two stitches together
kf&b- knit front and back of stitch
p2tog- purl two stiches together
LC- Left Cross (defined below)
p- purl
pf&b- purl front and back of stitch
pm- place marker
RC- Right Cross (defined below)
skpo- slip knit pass over
yo- yarn over
yf- yarn forward
yb- yarn back
Gauge:
18 stitches by 23 rows in stockinette = 4 inches x 4 inches
Measurements/Sizes:
All bonnets are an average of 5 ½ inches deep x 5 ½ inches high when blocked
Skill Level:
Easy/Intermediate
Special Stitches:
RC (Right Cross)- Slip next stitch on cable needle and hold at back of work, knit next stitch from left-hand needle, then purl stitch from cable needle.
LC (Left Cross)- Slip next stitch onto cable needle and hold at front of work, purl next stitch from left-hand needle, then knit stitch from cable needle.
For more information for the LC and RC stitches, visit: How to Knit Cable Stitches
Knit Crossovers Without Cable Needle:
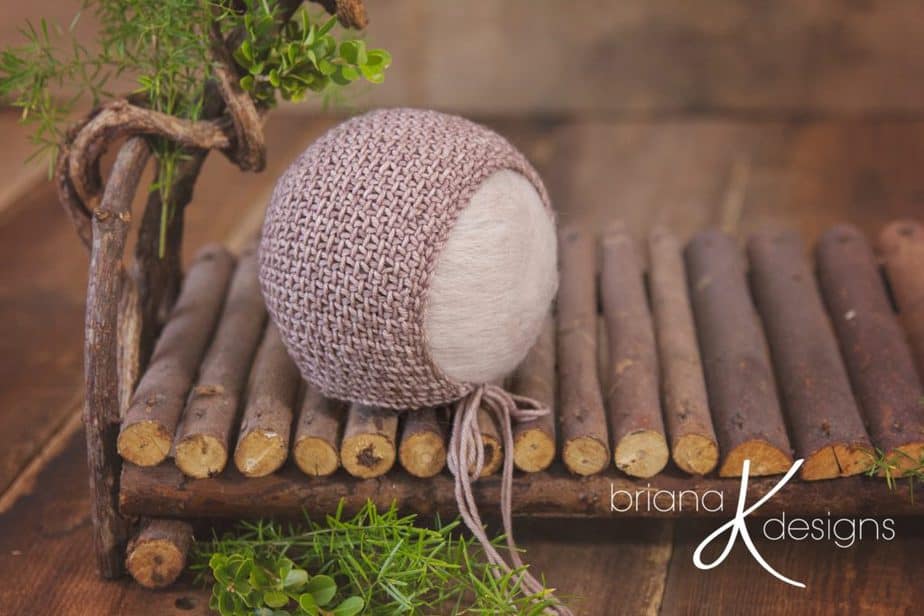
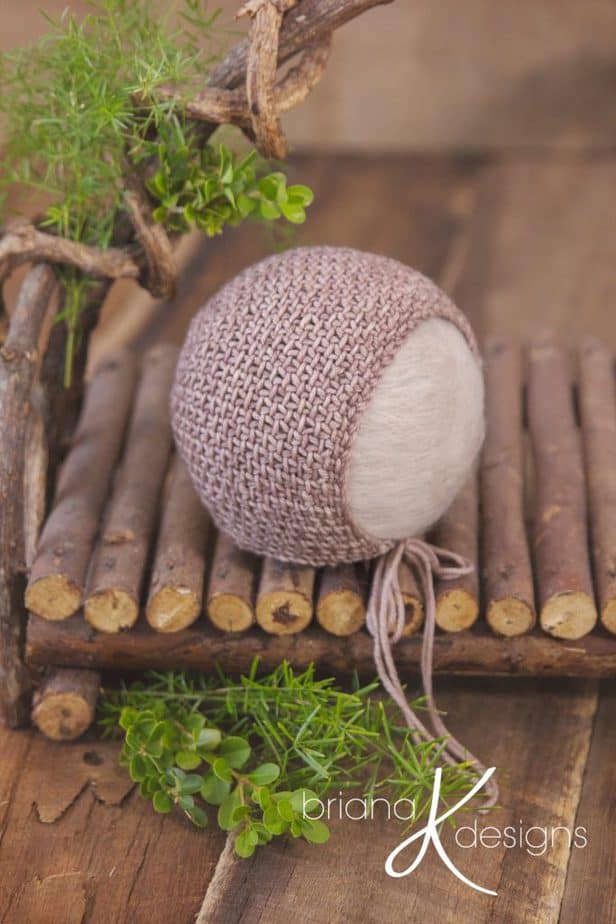
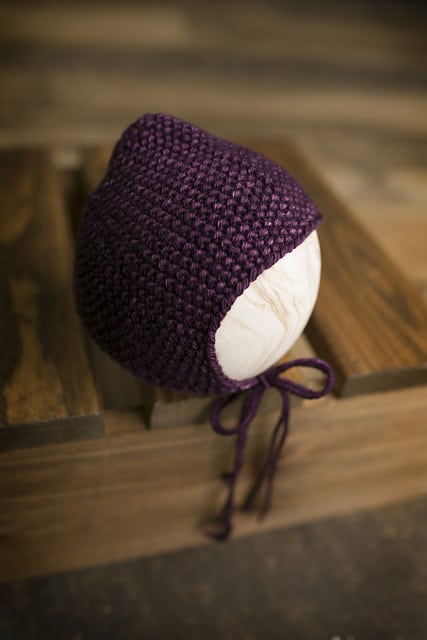
Linen Stitch Newborn Knit Bonnet Pattern
About the knit linen stitch :
The knit linen stitch is a very simple yet attractive knitting technique. It has been used for centuries to create beautiful fabrics and garments that are durable, stylish, and comfortable. The stitch pattern creates a woven fabric with alternating columns of knits and purls, creating a look reminiscent of linen.
This stitch is perfect for lightweight summer projects or for creating texture in baby bonnets and clothing. It also works well with variegated and self-striping yarns. Try the knit linen stitch today and let your creativity shine!
The linen has an easy stitch repeat so you won't need to look at the pattern for long before you memorize the repeat. The only stitches for the pattern are knit stitches, purl stitches, and slip stitches.
Does the Linen Stitch Lay Flat?
Yes, the Linen Stitch does lay flat. Its tight and dense nature makes is an excellent stitch for creating projects with straight edges and even textures. The linen stitch is often used in knitting for garments such as baby blankets, scarves, and more.
With its unique texture and durability, it makes a great choice for any project requiring long-lasting fabric. With the right tension, you can achieve beautiful results with the Linen Stitch that will be sure to last you for years to come. Thanks for your question! Happy knitting!
Does the Linen Stitch Use More Yarn?
The Linen Stitch is an intricate knitting pattern that produces a flat, dense fabric. As with any project, the amount of yarn used depends on the size of the project and the type of yarn used. Generally speaking, when using a worsted weight yarn, larger projects may require more yarn for the Linen Stitch than other stitches.
Can the Linen Stitch be Reversible?
Technically no in terms of looking the same on each side. However, for this newborn bonnet, you can use the reverse side of this stitch for another stitch style.
Newborn Knit Bonnet Written Pattern
Row 1: Long Tail or Cable Cast On 51 sts.
Row 2: k1, *yarn forward (yf), slip 1 purlwise, yarn back (yb), k1; repeat * to end 51 sts
Row 3: p2, *yb, slip 1 purlwise, yf, p1; repeat * to last stitch, p1
Row 4-39: Repeat rows 2-3 until bonnet is approx. 4 ½ inches deep, ending on an odd row 51 sts
Finishing in the Round in Linen Stitch Knit Pattern
Rnd 40: Working in the round, k2tog, *yf, slip 1 purlwise, yb, k1; repeat * until last stitch. 50 sts
Rnd 41: k2tog, *yf, slip 1 purlwise, yb, k1; five times; yf, slip 1 purlwise; repeat * around. 50 sts
Rnd 42: *k2tog, (yf, slip 1 purlwise, yb, k1) four times; repeat * around. 45 sts
Rnd 43: *k2tog, (yf, slip 1 purlwise, yb, k1) three times, yf, slip 1 purlwise; repeat * around. 40 sts
Rnd 44: *k2tog, (yf, slip 1 purlwise, yb, k1) three times; repeat * around. 35 sts
Rnd 45: *k2tog, (yf, slip 1 purlwise, yb, k1) two times, yf, slip 1 purlwise; repeat * around. 30 sts
Rnd 46: *k2tog, (yf, slip 1 purlwise, yb, k1) two times; repeat * around. 25 sts
Rnd 47: *k2tog, yf, slip 1 purlwise, yb, k1, yf, slip 1 purlwise; repeat * around. 20 sts
Rnd 48: *k2tog, yf, slip 1 purlwise, yb, k1; repeat * around. 15 sts
Rnd 49: *k2tog, yf, slip 1 purlwise, yb; repeat * around. 10 sts
Fasten off the yarn, using a yarn needle, and weave through the final 10 stitches to close the opening. Weave in ends.
Finishing in the Round in NO Pattern
Rnd 40: Working in the round k2tog, knit rest around.50 sts
Rnd 41: *k2tog, k8; repeat * around. 45 sts
Rnd 42: *k2tog, k7; repeat * around. 40 sts
Rnd 43: *k2tog, k6; repeat * around. 35 sts
Rnd 44: *k2tog, k5; repeat * around. 30 sts
Rnd 45: *k2tog, k4; repeat * around. 25 sts
Rnd 46: *k2tog, k3; repeat * around. 20 sts
Rnd 47: *k2tog, k2; repeat * around. 15 sts
Rnd 48: *k2tog, k1; repeat * around. 10 sts
Fasten off the yarn, using a yarn needle, and weave through the final 10 stitches to close the opening. Weave in ends.
Finishing Flat in Knit Linen Stitch Pattern
Row 40: k1, *yf, slip 1 purlwise, yb, k1; repeat * until last 2 stitches, k2tog. 50 sts
Row 41: p1, *yb, slip 1 purlwise, yf, p1; repeat * to last stitch, p1. 50 sts
Row 42: *k2tog, (yb, k1, yf, slip 1 purlwise) four times; repeat * across until last 10 stitches, *k2tog, (yb, k1, yf, slip 1 purlwise) three times, k2. 45 sts
Row 43: *(yf, p1, yb, slip 1 purlwise) three times, p2tog, (yb, slip 1 purlwise, yf, purl) three times, p2tog; repeat * one more time, (yb, slip 1 purlwise, yf, purl) three times, p2tog, (p1, yb, slip 1 purlwise) twice, p1. 40 sts
Row 44: *k2tog, (yf, slip 1 purlwise, yb, k1) two times; repeat * one more time. **(yb, k1, yf, slip 1 purlwise) three times, k2tog; repeat ** two more times. 35 sts
Row 45: *yb, slip 1 purlwise, (p1, yb, slip 1 purlwise) two times, p2tog; repeat * two more times. (p1, yb, slip 1 purlwise) two times, p2tog, p1, yb, slip 1 purlwise, p2tog, (slip 1 purlwise, p1) twice. 30 sts
Row 46: *k2tog, (yf, slip 1 purlwise, yb, k1) two times*, k2tog, (yb, k1, yf, slip 1 purlwise) two times; repeat * to * across. 25 sts
Row 47: *yb, slip 1 purlwise, p1, yb, slip 1 purlwise, p2tog; repeat * across. 20 sts
Row 48: *k2tog, yf, slip 1 purlwise, yb, k1; repeat * around. 15 sts
Row 49: *yb, slip 1 purlwise, yf, p2tog; repeat * around. 10sts
Fasten off the yarn, using a yarn needle, and weave through the final 10 stitches to close opening. Seam bonnet to row 39, weave in ends.
Finishing Flat NO Pattern
Row 40: k2tog, knit rest across. 50 sts
Row 41: *p8, p2tog; repeat * across. 45 sts
Row 42: *k2tog, k7; repeat * across. 40 sts
Row 43: *p6, p2tog; repeat * across. 35sts
Row 44: *k2tog, k5; repeat * across. 30 sts
Row 45: *p4, p2tog; repeat * across. 25 sts
Row 46: *k2tog, k3; repeat * across. 20 sts
Row 47: *p2, p2tog; repeat * across. 15 sts
Row 48: *k2tog, k1; repeat * across. 10 sts
Fasten off the yarn, using a yarn needle, weave through the final 10 stitches to close the opening. Seam bonnet to row 39, weave in ends.
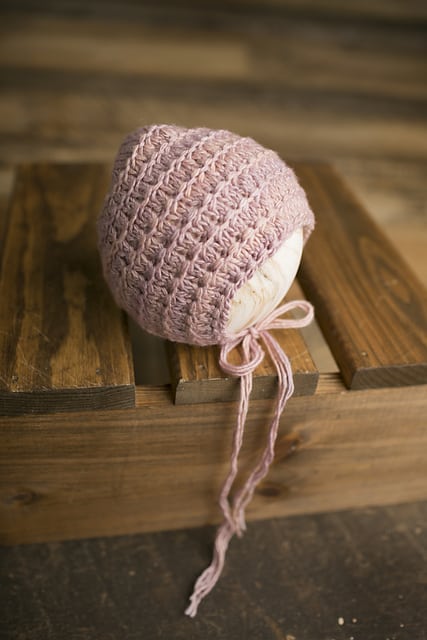
Stockinette Stitch Ridge Newborn Bonnet
This stitch is an easy four-row repeat. The stocking stitch ridge uses rows of knit, knit decreases, knit increases, and purl rows. It creates a nice texture with lines going across the fabric. The decreased stitches create a bit of an eyelet effect.
Is the stockinette stitch flexible?
Yes, shockingly, even though it has a lot of decreases, it still has some flexibility. It must be blocked to lessen the curl on the front of the bonnet.
Want to see a video tutorial for the stockinette ridge stitch? Visit Knit a Cozy Blanket with the Stockinette Ridge Stitch Free Pattern and also get instructions for a free blanket knit pattern. You could make a knit blanket to match this bonnet, how adorable is that?
Stockinette Ridge Stitch Bonnet Written Instructions
Row 1: Long Tail or Cable Cast On 50 sts.
Row 2: p1, *k2tog; repeat * to last stitch, p1. 26 sts
Row 3: k1, *kf&b; repeat * to last stitch, k1. 50 sts
Row 4: Purl. 50 sts
Row 5: Knit. 50 sts
Row 6-29: Repeat rows 2-5 six more times. 26 or 50
Row 30: p1, *k2tog; repeat * to last stitch, p1. 26 sts
Row 31: k1, *kf&b; repeat * to last stitch, k1. 50 sts
Finishing in the Round in Stockinette Stitch Ridge Pattern
Rnd 32: Working in the round, knit. 50 sts
Rnd 33: *k2tog, k8; repeat * around. 45 sts
Rnd 34: *p2tog; repeat * until last, purl in last. 23 sts
Rnd 35: *kf&b, k1; repeat * until last, kf&b in last. 35 sts
Rnd 36: *k2tog, k5; repeat * around. 30 sts
Rnd 37 *k2tog, k4; repeat * around. 25 sts
Rnd 38 *p2tog, p3; repeat * around. 20 sts
Rnd 39 *k2tog, k2; repeat * around. 15 sts
Rnd 40 *k2tog, k1; repeat * around. 10 sts
Fasten off yarn, using a yarn needle weave through final 10 stitches to close opening. Weave in ends.
Finishing in the Round in NO Pattern
Rnd 32: Working in the round, knit. 50 sts
Rnd 33: *k2tog, k8; repeat * around. 45 sts
Rnd 34: *k2tog, k7; repeat * around. 40 sts
Rnd 35: *k2tog, k6; repeat * around. 35 sts
Rnd 36: *k2tog, k5; repeat * around. 30 sts
Rnd 37: *k2tog, k4; repeat * around. 25 sts
Rnd 38: *k2tog, k3; repeat * around. 20 sts
Rnd 39: *k2tog, k2; repeat * around. 15 sts
Rnd 40: *k2tog, k1; repeat * around. 10 sts
Fasten off yarn, using a yarn needle weave through final 10 stitches to close opening. Weave in ends.
Finishing Flat in Stockinette Stitch Ridge Pattern
Row 32: purl across 50 sts
Row 33: *k2tog, k8; repeat * around. 45 sts
Row 34: p1, *k2tog; repeat * across. 23 sts
Row 35: *kf&b, k1; repeat * until last, kf&b in last. 35 sts
Row 36: *p2tog, p5; repeat * across. 30 sts
Row 37: *k4, k2tog; repeat * across. 25 sts
Row 38: *k2tog, k3; repeat * around. 20 sts
Row 39: *k2, k2tog; repeat * across. 15 sts
Row 40: *p2tog, p1; repeat * around. 10 sts
Fasten off the yarn, using a yarn needle, and weave through the final 10 stitches to close the opening. Seam bonnet to row 32, weave in ends.
Finishing Flat with NO Pattern
Row 32: knit across.50 sts
Row 33: *p8, p2tog; repeat * across. 45 sts
Row 34: *k2tog, k7; repeat * across. 40 sts
Row 35: *p6, p2tog; repeat * across. 35 sts
Row 36: *k2tog, k5; repeat * across. 30 sts
Row 37: *p4, p2tog; repeat * across. 25 sts
Row 38: *k2tog, k3; repeat * across. 20 sts
Row 39: *p2, p2tog; repeat * across. 15 sts
Row 40: *k2tog, k1; repeat * across. 10 sts
Fasten off the yarn, using a yarn needle, weave through the final 10 stitches to close opening. Seam bonnet to row 32, weave in ends.
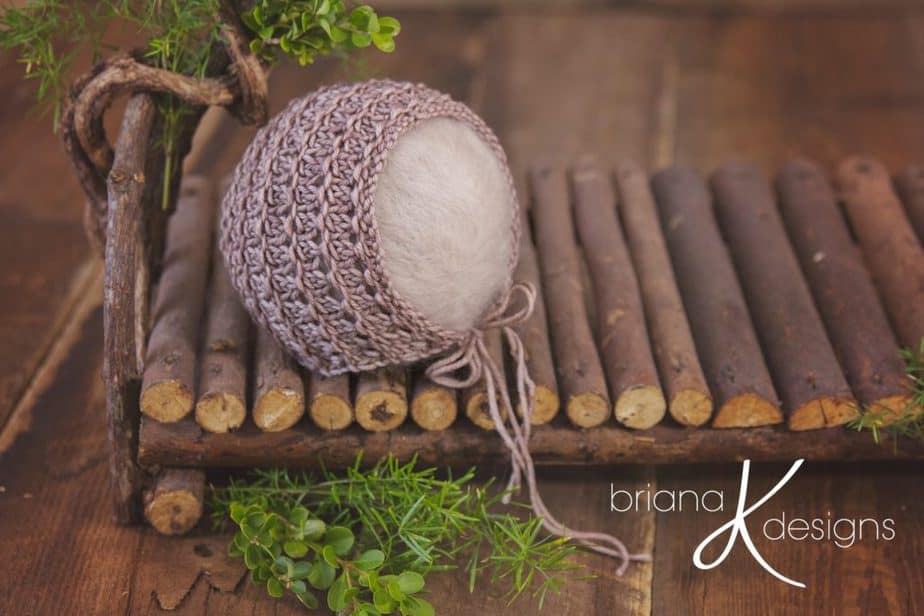
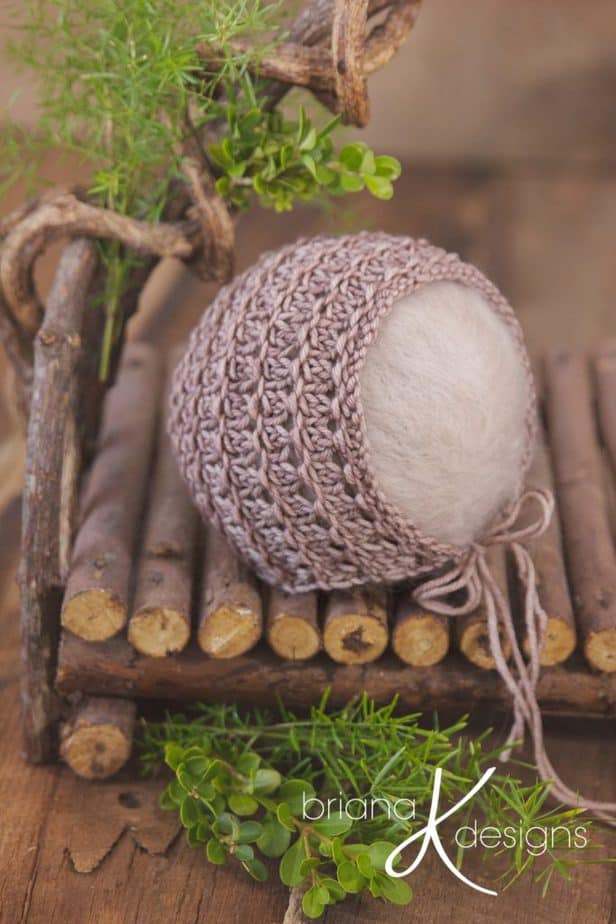
Crossover Texture Newborn Bonnet
Come learn how to do the basic knit left cross and right cross stitches. I have a video tutorial to guide you through these stitches. You can use a cable needle for these knit crossovers or ditch it altogether.
Crossover Texture Written Pattern
Row 1: Long Tail or Cable Cast On 50 sts.
Row 2: k1, *RC, LC; repeat * to last stitch, k1. 50 sts
Watch the video below to learn the Right Cross and the Left Cross Knit stitch.
Row 3: Purl. 50 sts
Row 4: k1, *LC, RC; repeat * to last stitch, k1. 50 sts
Row 5: Purl. 50 sts
Rows 6-34: Repeat rows 2-5 seven more times. 50 sts
Row 35: k1, *RC, LC; repeat * to last stitch, k1. 50 sts
Row 36: Purl. 50 sts
Row 37: k1, *LC, RC; repeat * to last stitch, k1. 50 sts
Finishing in the Round in Crossover Texture Pattern
Rnd 38: Working in the round, knit. 50 sts
Rnd 39: *k2, p2tog; repeat * to last 2 stitches, k2. 38 sts
Rnd 40: Knit. 38 sts
Rnd 41: *k2tog, p1, repeat * to last 2, k2tog. 25 sts
Rnd 42: Knit. 25 sts
Rnd 43: *k2tog, k1, p1, k1, k2tog, p1, k1, p1; repeat until last 5 stitches, k2tog, k1, p1, k1. 20 sts
Rnd 44: *k2tog; repeat * around. 10 sts
Fasten off yarn, using a yarn needle weave through final 10 stitches to close opening. Weave in ends.
Finishing in the Round NO Pattern
Rnd 38: Working in the round *k2tog, k8; repeat * around. 45 sts
Rnd 39: *k2tog, k7; repeat * around. 40 sts
Rnd 40: *k2tog, k6; repeat * around. 35 sts
Rnd 41: *k2tog, k5; repeat * around. 30 sts
Rnd 42: *k2tog, k4; repeat * around. 25 sts
Rnd 43: *k2tog, k3; repeat * around. 20 sts
Rnd 44: *k2tog, k2; repeat * around. 15 sts
Rnd 45: *k2tog, k1; repeat * around. 10 sts
Cut yarn, using a yarn needle weave through the final 10 stitches to close the opening. Weave in ends.
Finishing Flat in Crossover Texture Pattern
Row 38: Purl. 50 sts
Row 39 *k2, p2tog; repeat * to last 2 stitches, k2. 38 sts
Row 40: Purl. 38 sts
Row 41: *k2tog, p1, repeat * to last 2, k2tog. 25 sts
Row 42: Purl. 25 sts
Row 43: *k2tog, k1, p1, k1, k2tog, p1, k1, p1; repeat until last 5 stitches, k2tog, k1, p1, k1. 20 sts
Row 44: *p2tog; repeat * across. 10 sts
Fasten off yarn, using a yarn needle weave through final 10 stitches to close opening. Seam bonnet to row 38, weave in ends.
Finishing Flat NO Pattern
Row 38: *p8, p2tog; repeat * across. 45 sts
Row 39: *k2tog, k7; repeat * across. 40 sts
Row 40: *p6, p2tog; repeat * across. 35 sts
Row 41: *k2tog, k5; repeat * across. 30 sts
Row 42: *p4, p2tog; repeat * across. 25 sts
Row 43: *k2tog, k3; repeat * across. 20 sts
Row 44: *p2, p2tog; repeat * across. 15 sts
Row 45: *k2tog, k1; repeat * across. 10 sts
Cut yarn, using a yarn needle weave through final 10 stitches to close opening. Seam bonnet to row 38, weave in ends.
Finishing the Baby Bonnets with Ties
For each strap of the bonnet to tie around the neck, you can use strands of yarn to create ties or crochet a chain for the steps. You could also knit an i-cord as another option.
These baby bonnets with ties should always be worn under supervision.